
As a lover of warm weather, I should’ve been happy about the unseasonably warm temperatures in October. But even I couldn’t really be happy about beach worthy weather in October. If I had to wear a winter coat over my Wonder Woman costume to go trick-or-treating, the kids these days better have to, too! Kidding… But honestly, I stopped shaving my legs a few weeks ago so I welcome the cold weather and the skin-covering attire that accompanies it.
The days are getting shorter and a few days ago, it was like a switch was flipped and we entered autumn weather just like that! Daisy (the lazy one of my two pups) doesn’t stop halfway through our walk to lie down in the shade anymore! The chill in the air smells like the sweetness of holiday anticipation. My cousin has already organized our secret santa gift exchange on Elfster!
Just like that… another year coming to an end. But we mustn’t let the days slip by! Take full advantage! Take a look at your calendar and fill up any free days you have! Save a day just for you– relax. But fill other days with opportunities to see family and friends! While you’re at it, make this cookie dough the night before or make it a baking party!
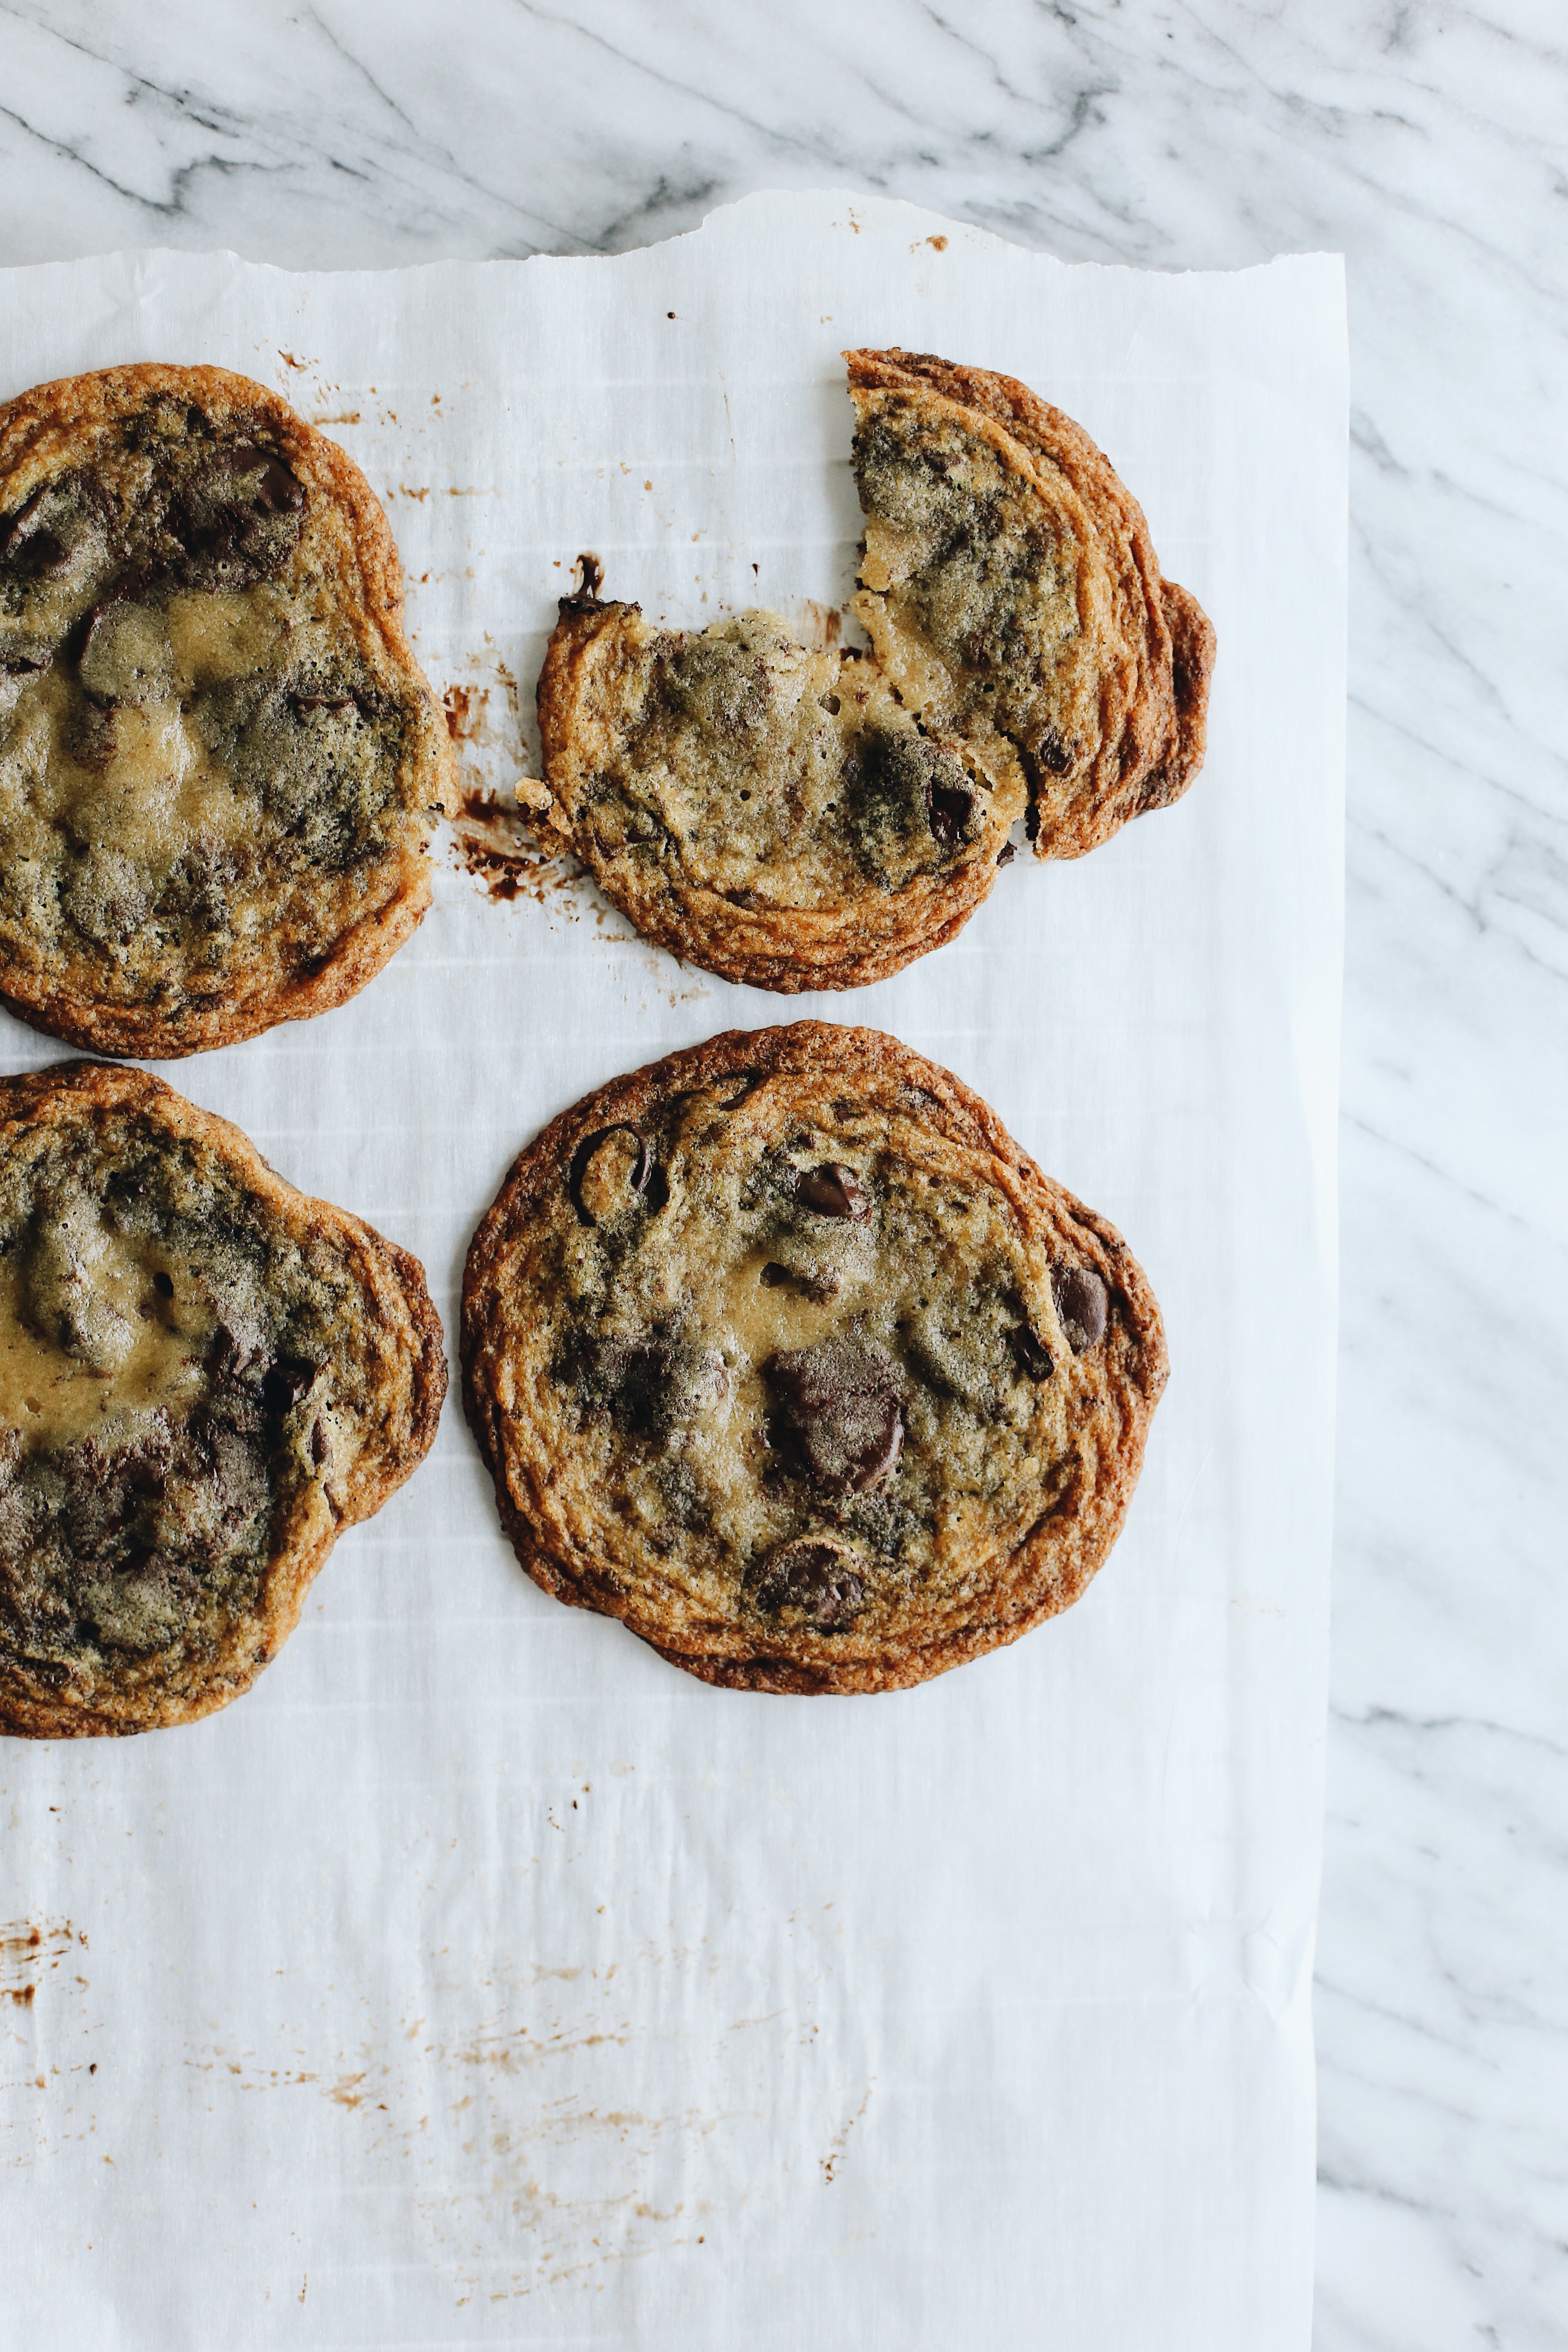
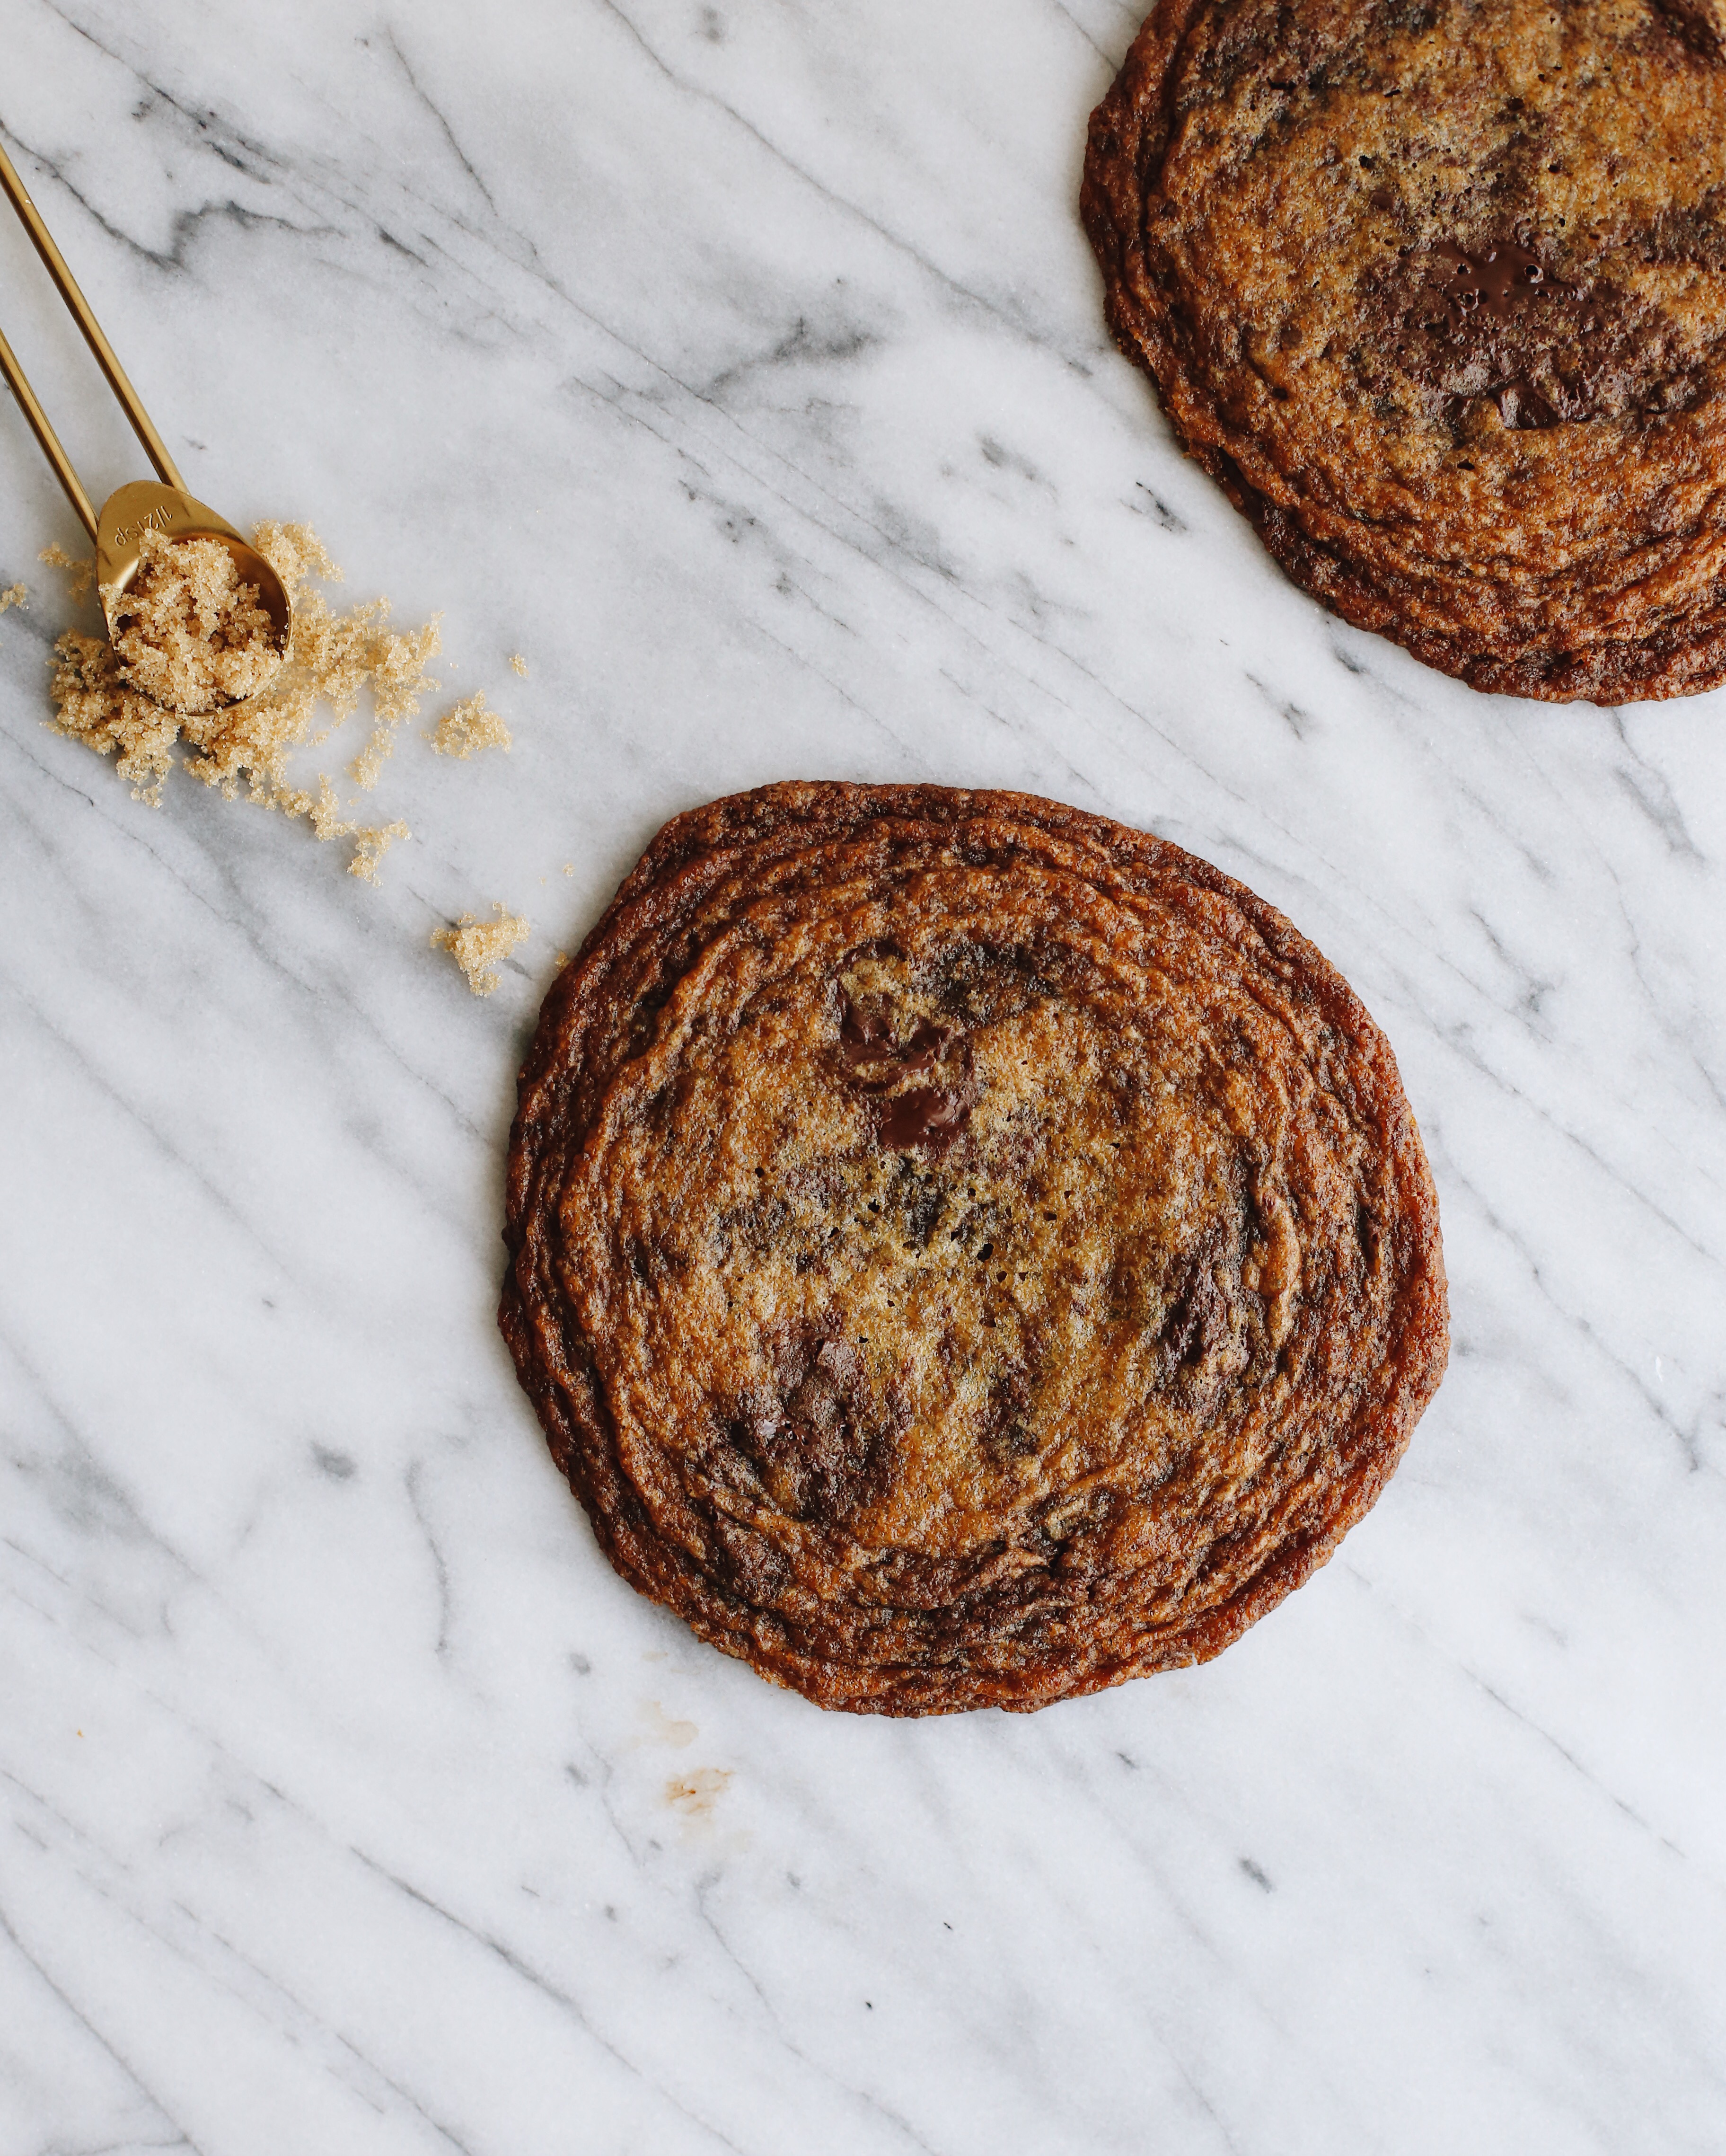
Okay, so I know we all love a picture perfect thick and soft, melt-in-your-mouth chocolate chip cookie with a goooey center that oozes puddles of chocolate. And we’re always reminded to chill our cookie dough so we don’t end up with flat cookies because flat = fail, right? WRONG.
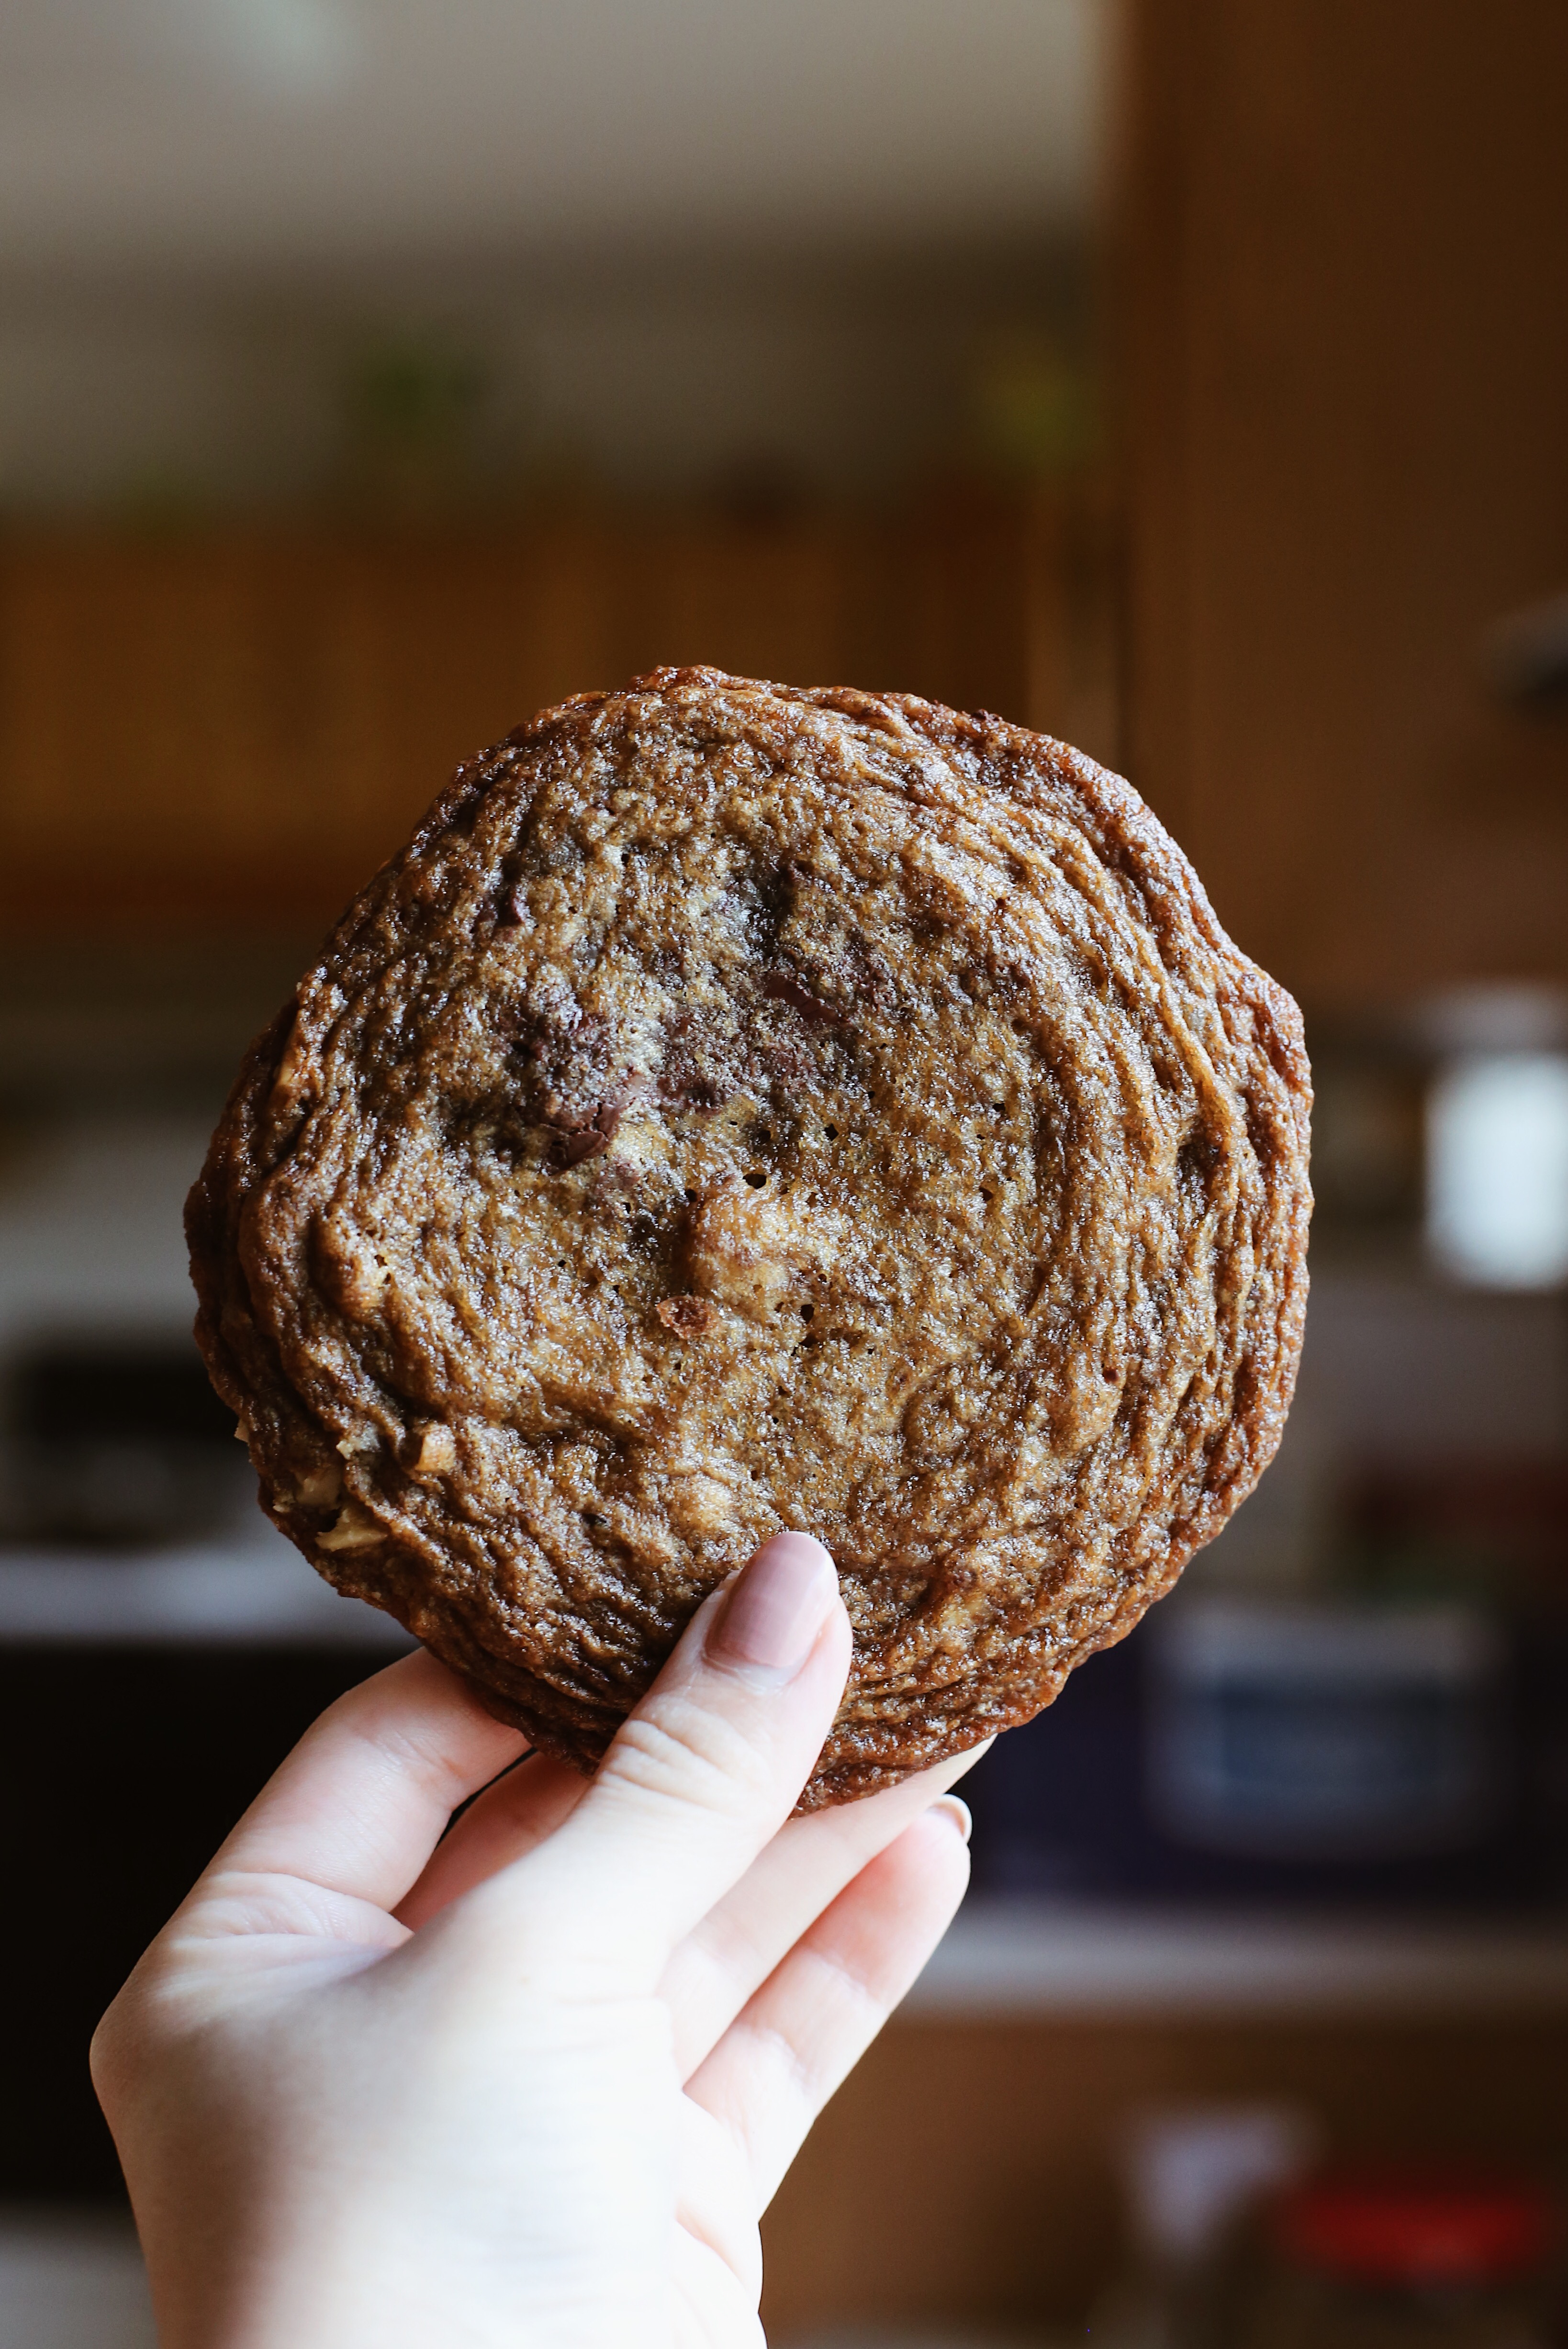
So while I lovee a great Levain Bakery inspired thick, ooey gooey cookie, I think I’m going to have to admit that my loyalty may lie with a flatter and muchhh chewier cookie. So I present to you… the FLAT AND CHEWY CHOCOLATE CHIP COOKIE!
Honestly, I decided to make these to accommodate my mom’s tastes. She’s loves sweets but is not one for overly decadent treats. She remembers the chewy snickerdoodles my sister used to make and often comments on how good my aunt’s chewy cookies are too! So I decided to make the bestttt chewy chocolate chip cookie EVER, just for her!
I’m so excited about these because they’re truly delicious even though not everyone would find them exactly aesthetically pleasing. But I promise, YOU WILL LOVE THESE.
The high ratio of sugar and butter to flour here makes these cookies spread when baking. The whole cookie becomes a dark golden brown. Slightly crispy all around the edges. The entire cookie is caramelized, chewy perfection. With strong notes of toffee and caramel, this cookie doesn’t need crazy amounts of chocolate chips. In my first batch, I put in 4 ounces of a chopped Baker’s 58% chocolate bar, and a small handful of large chocolate chips. And for my dad who loves a good nutty crunch in EVERYTHING, I put about 1½ cups of toasted chopped walnuts. Even for someone like me who’s mantra has always been “the more chocolate the better,” this was PERFECT.
A friend (and extremely picky eater) said these were the best cookies he’s ever had!
NOTES:
- Chilling cookie dough: I know we all want to enjoy our cookies right away, but chilling cookie dough is one of the best things you can do as far as cookies are concerned. I’m not talking about chilling it just for the sake of texture and shape. Chilling cookie dough (especially if you do so overnight) does MAGICAL things. Cookie dough science is involved. The dough gets drier, ingredients more concentrated, flavors are INTENSELY enhanced– they get richer and deeper. The cookies even come out more beautifully and perfectly browned. Trust me.
- Measuring flour: it’s so simple but I had been doing this wrong for so long. I used to just dunk my measuring cup straight into my bag of flour and shake off the top until it seemed level on top. But you can easily end up with too much flour and sub-par cookies! The easiest fix to this is to use a spoon or fork to fluff up the flour, and then spoon it into your measuring cup without packing any of it down. Once you’ve spooned enough to have a heapful on top, use the straight edge of a butter knife to scrape off the top.
INGREDIENTS
2 cups all-purpose flour (my fave is King Arthur, unbleached)
1 teaspoon baking soda
¼ teaspoon kosher salt
1 cup (2 sticks) unsalted or salted butter, room temperature, cubed
1¼ cup light brown sugar, packed
½ cup granulated sugar
2 large eggs, room temperature
2 teaspoons vanilla extract
1½ cup chocolate chunks or chips (i like a mixture of the two)
1 cup walnuts (optional)
INSTRUCTIONS
- In a medium bowl, whisk together flour, baking soda, and kosher salt. Set aside.
- With a paddle attachment on stand mixer, mix butter, brown sugar, and granulated sugar on medium speed until light fluffy, 3 minutes.
- Switch to low speed and add eggs, then vanilla, beating until fully incorporated. Stop to scrape down the sides of mixing bowl.
- Add in flour and mix at low speed until incorporated. DO NOT over mix.
- Fold in chocolate and walnuts. Again, don’t over mix.
- Cover with plastic wrap and refrigerate. Since we want flat cookies, there’s no need to chill for a long period of time. Although, if you let the dough chill over night, you will get the best results as far as TASTE is concerned. Refer to my note about chilling dough. I strongly recommend it.
- Preheat oven to 325°F and line cookie sheet with parchment paper.
- Scoop out dough and make about 2 inch balls. Roughly shape with hands but don’t over work the dough. Place on cookie sheet leaving 3-4 inches between each cookie (they will spread out a lot).
- Bake for 16 minutes. They will appear undercooked in the middle but take them out! ****
- Let cookies set and cool on baking sheet for 5 minutes before transferring to cooling rack.
**** For the really flat and extremely crinkly cookies in some of my pictures, you can use Sarah Keiffer’s method! This will yield flatter, even CHEWIER cookies. My mom likes them this way, but I prefer the original steps in my recipe.
**** Sarah Keiffer’s (of the Vanilla Bean Blog) method. Refer back to step 9. Bake for only 10 minutes. Open oven and with oven mits, lift the cookie sheet and bang it down on the oven rack several times to de-puff the middles of the cookies. Close the oven and bake for another 2 minutes. Repeat the banging technique 2 more times, baking 2 more minutes after each time, for a total baking time of 16 minutes.
These cookies will be perfectly soft if you enjoy right out of the oven! But they get even better when fully cooled, when they’ll become chewy and amazing! This makes them the perfect cookies to bring to holiday parties and get togethers! They can be baked the night before and taste even better the following day! But remember to store in air tight container!
xx Ang